
Winter weather is on its way out and Michaels had me feeling some type of way in March by putting their spring floral and wreaths out at 50% off. Ugh. Wishful thinking for Early March in Wisconsin!
Per Wikipedia: “The term ‘spring fever’ is an auto-antonym (a term with multiple and opposed meanings):
On the one hand, the term may refer to an increase in energy, vitality, and sexual appetite, as well as a feeling of restlessness, associated with the end of winter.”
I am talking about the latter, here. ☺
What says, “Later, Snow!” more than bright peachy-pink tulips greeting you on your front door?
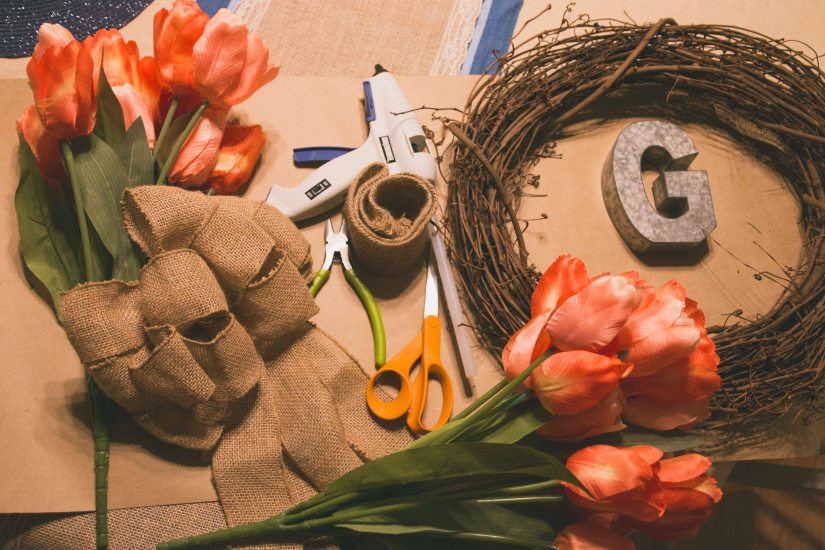
Here’s what you’ll need:
- About 15-20 minutes for assembly
- Two bunches of tulips (or any spring flower(s) you love!)
- 14″ grapevine wreath
-
- Any size wreath from Michaels will work depending on the flowers you’ve chosen
- Burlap Ribbon/Bow
-
- I went with this premade bow from Hobby Lobby for ease, but to cut costs, or to make a smaller bow, you could make your own with burlap ribbon.
- Wire cutters (I’m in love with this pair from Walmart)
- Hot glue gun (optional)
Instructions
Begin by trimming the stems off individually at the base where they are joined together with your wire cutters. Don’t try to cut corners by using scissors!

Decide which way your grapevine will look best hanging before you start placing the flowers. These wreaths can be a little lopsided. I prefer to place the flowers on the bulkier side of the grapevine wreath to cover up that imperfection.

Find the middle and start sliding tulip stems into the wreath. It may take a bit of pushing to get them to lay flat. I start from the bottom and build behind and upward until they hang off of the top just a bit. You should use your preference on how many flowers you would like in this wreath. Start the same process for the flowers that will be pointing downward leaving approx. 4 inches between the two groupings of flowers– this is where you will adhere the bow.

I like to wrap one loop of ribbon around the wreath to create a finished look, but I believe it’s not completely necessary as the bow will cover most of the stems. To wrap the wreath just measure the ribbon, trim, and seal closed with a few dots of hot glue.

After a bit of fluffin’ up, you can attach the bow with the wire it comes with, or use hot glue, or both!
Done!


For a bit of flare, you could add a last name letter or your house numbers down the middle or to the opposite side!

Show me YOUR wreaths!
